Clothing · Sewing Projects

Finally! I made my Renfrew!

about two years ago, my sister gave me a fabric+pattern Sewaholic Renfrew kit. It was either for Christmas or my birthday, so long ago I cannot remember. And it has sat in my sewing stash ever since.  Occasionally I would pull out the fabric or have a look at the pattern, but I always folded it away again because i was a bit reluctant to cock up the nice fabric and was concerned I’d end up with something unwearable.

then I made my cloud top last week. I love it. And it gave me the confidence to just cut the damn fabric. In the space of a week, I cut out the pieces, sewed it together and I’m wearing it right now.

IMG_0509
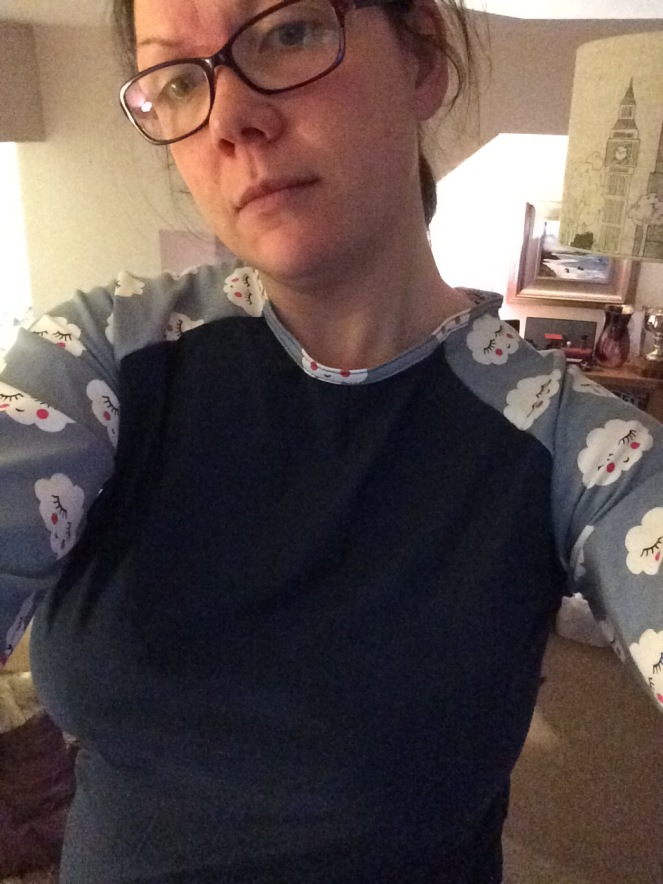
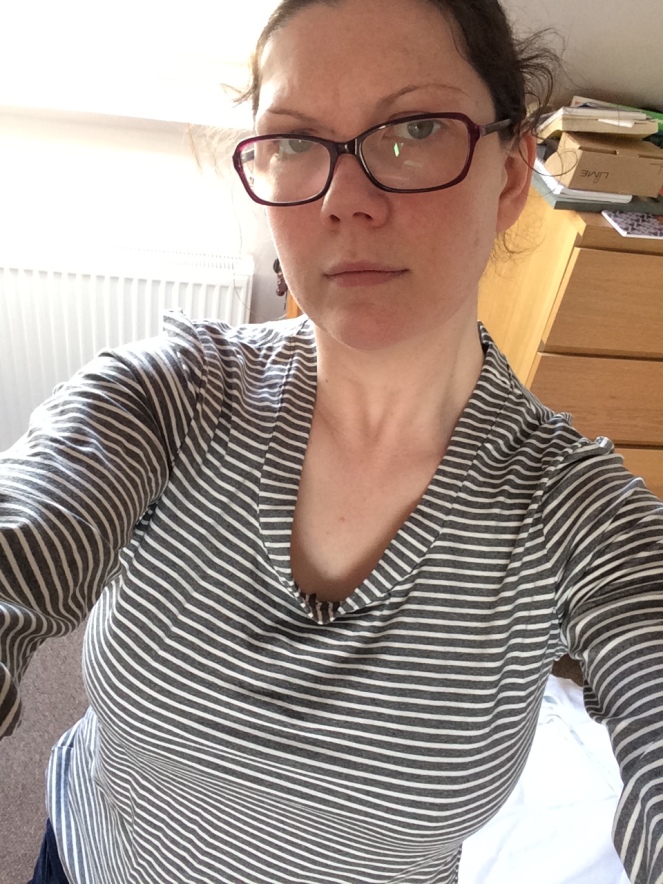
(Maybe I should have brushed my hair after all… never mind. Hello!)

now, there are a few things I’m a bit unsure about. What does “finish the seams” mean? Because when I finish my seams, that’s pretty much me looking at the seam I’ve stitched and then muttering “that’s that done then” and moving on. I will assume this is the case for everyone.

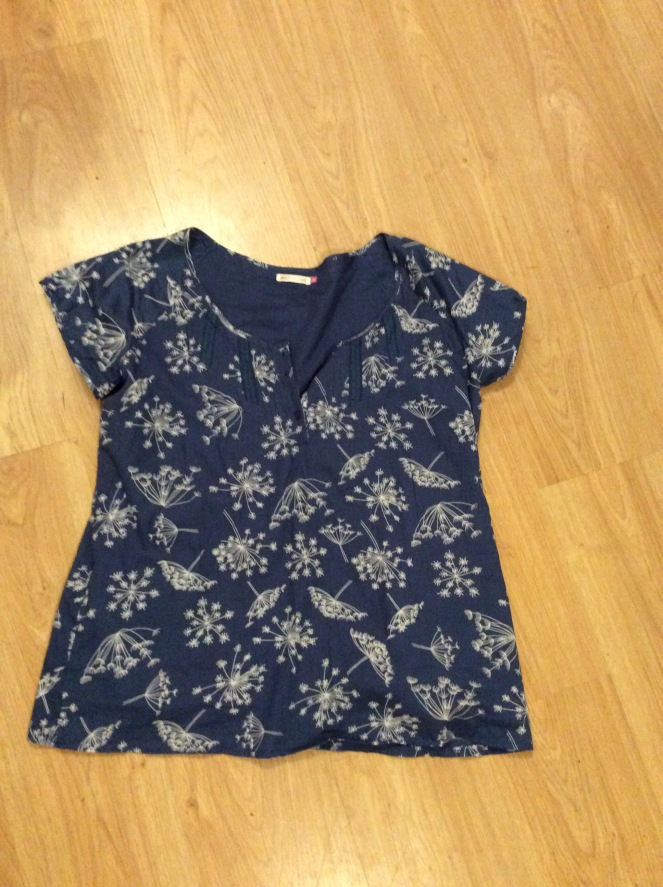
another is the sizing on the packet. Do i go with my measurements – this was a 14 on this pattern – or by the “finished garment” measurements? Because I’ve ended up with a top that is at least one size too big. I’m not too worried about that (my superior clothes washing abilities will get it shrunk in no time) but it’s a bit unclear which one I should follow. If I go for the finished garment size I could end up with something too small…

anyway.

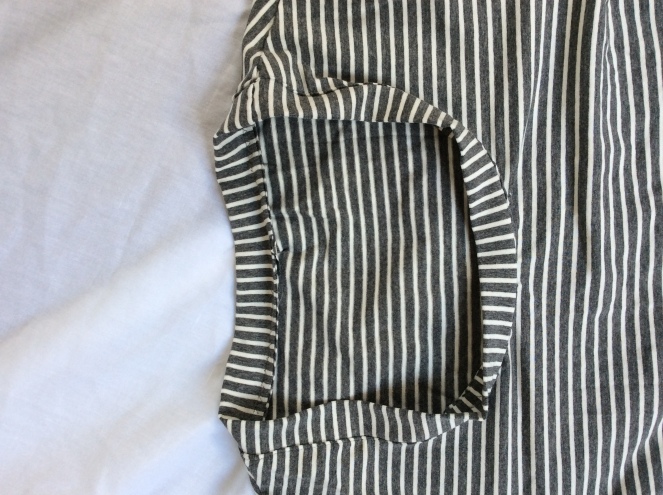
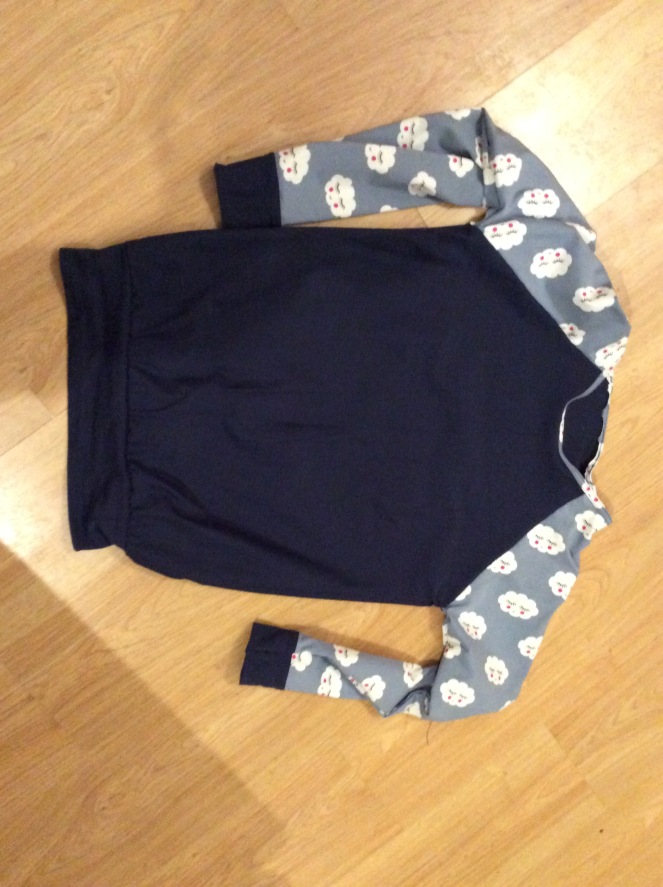
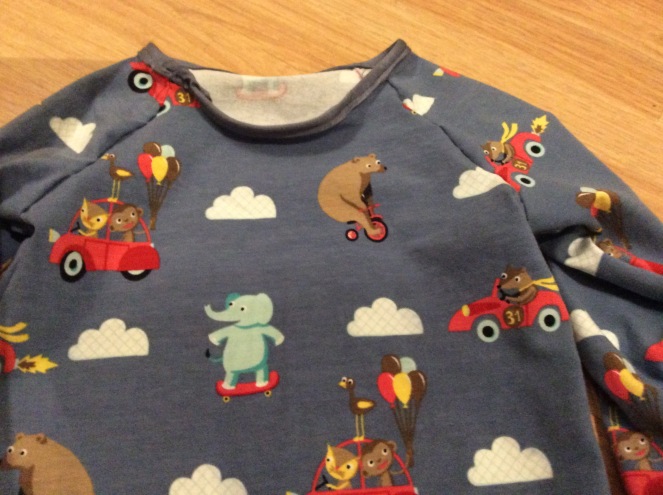
i like it. The fabric itself is a lovely heavy jersey, just right for the inbetweeny snow/sun weather we have these days (often the same day) in nearly highland Scotland. I like the way the neck is finished (“there, that’s done now“)

IMG_0508Although I have got a tiny pick up on the front neck, I don’t care. Because I MADE THIS AND I AM WEARING IT AND ISNT THAT BRILLIANT?!

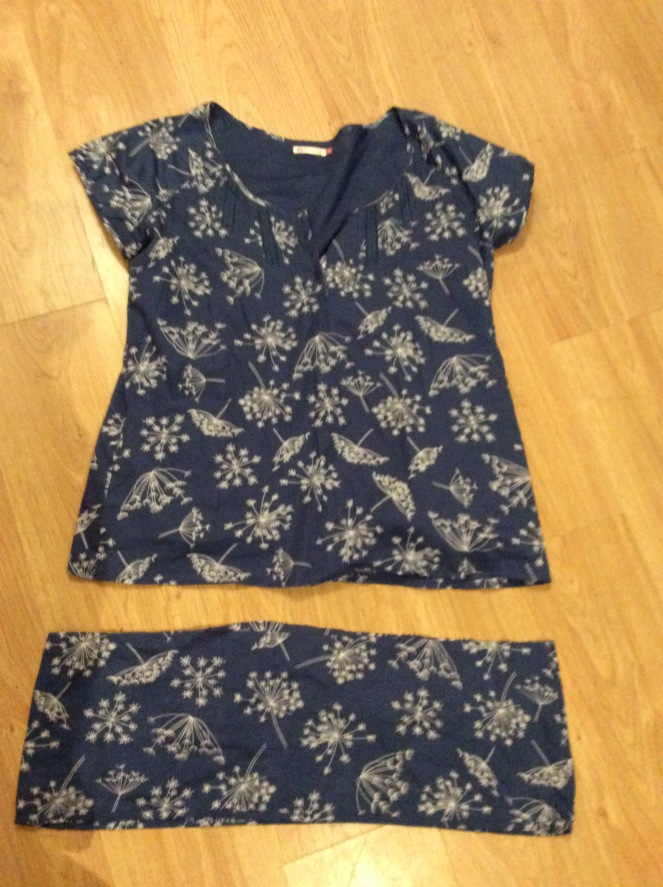
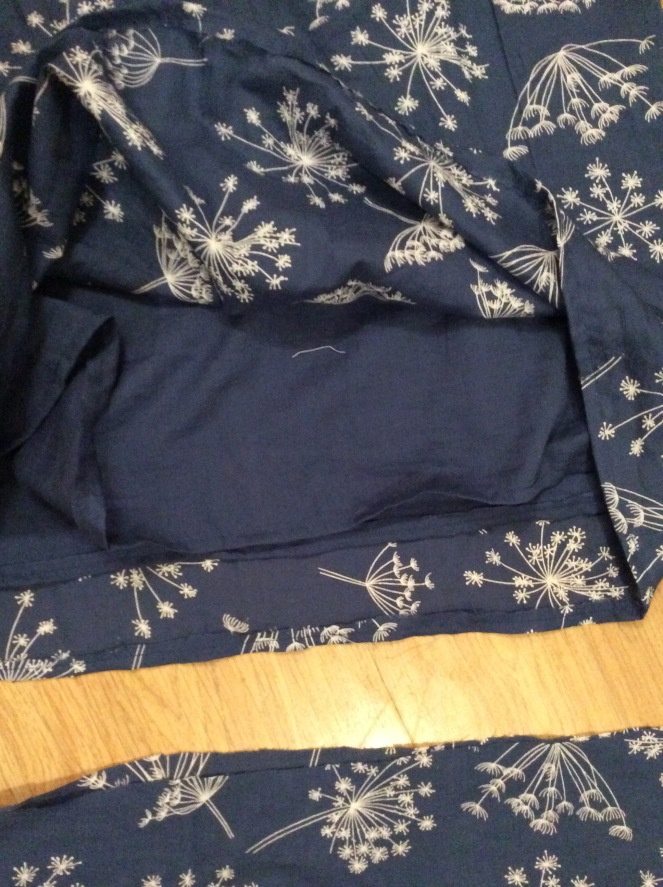
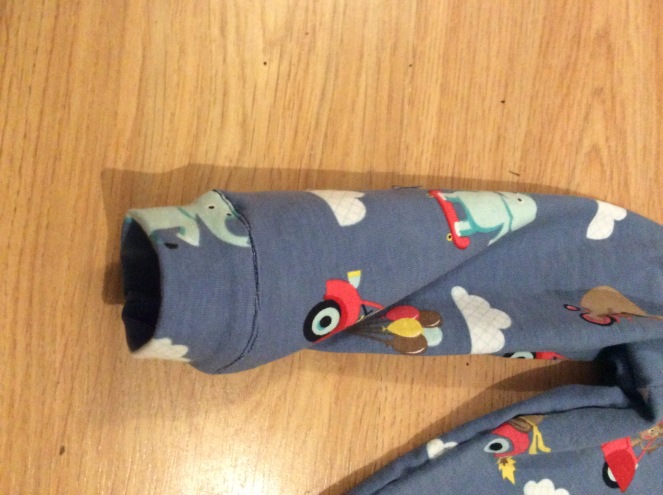
i like the cuffs and waistband insertion too

IMG_0507
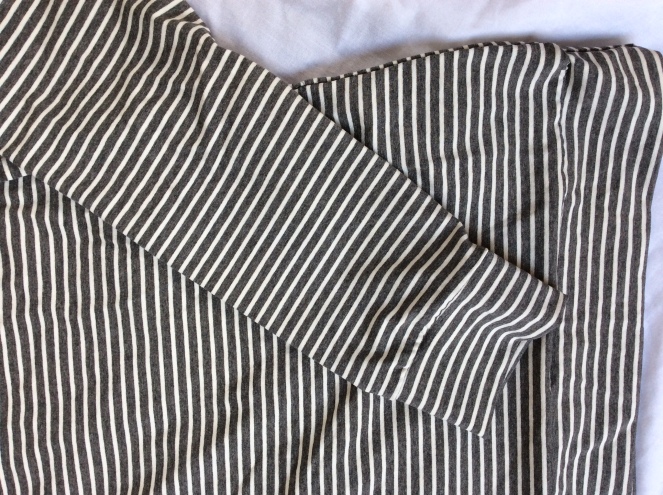
I didn’t top stitch around the seam here because I was worried about over stretching the cuffs. Because of the over sized nature of this (next time I’ll size down), the sleeves are quite loose already. But as I said, my wonder washing techniques will sort that no problem.

here it is, in all it’s glory
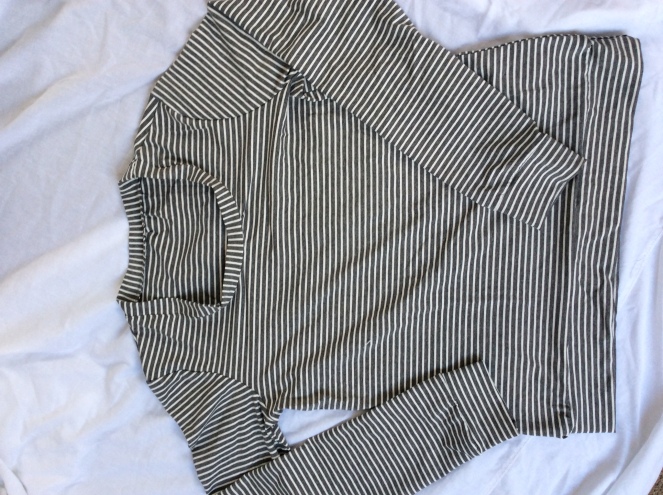
IMG_0506I love it.

and what I love most of all is that I actually did it. Fandabbydozi.

next item on the books is a cloud to for my daughter. Her expectations are worryingly high…

Clothing · Sewing Projects

Top of cloudy wonder

hello people! I am back from hibernation. And I’ve made myself a cracker of a top. I have literally just finished stitching it and already I love it. My top of cloudy wonder.

IMG_0501

Woah, massive poor quality selfie there. Sorry. But still, I love the top.

I’ve wanted a quirky raglan sleeve top for ages but couldn’t find one in the shops didn’t look that hard to be honest as I hate shopping and decided to do a bit of browsing on http://myfabrics.co.uk and found some lovely navy stretch jersey and some even lovelier bashful cloud jersey. Order made, I got the fabric delivered and as is now traditional, left it for about 4 months before I was brace enough to cut into it.

the pattern is…MY OWN. Yeah, amazeballs, right? It’s the same one I’ve used to make a few short sleeve tops and I cobbled the body and short sleeves together with sleeves from a GBSB pattern, just made narrower. I also narrowed the body pattern pieces as they were too wide, and raised the neck as the tops I’ve made are lower cut and suitable for tops but not for this jumper type thing I was hoping to make.

pattern cut, fabric cut, I then left the pieces for another traditional rest. Just a month this time.  After the rest, I tacked the sleeves and body pieces together to check the fit, and it was great so I didn’t need to tailor it or cut it any further. I’ve resisted tacking and trying on in the past as I thought it was a bit of a waste of time in the past, but it really helped knowing the top would fit before I sewed it up as I hate having to unstitch and restitch and YAWN.

I also decided to buy some stretch needles as I thought I probably should. Never used them before, I wasn’t really convinced there would be much difference in the stitching. Well HOW WRONG COULD I BE? This stitched like a DREAM with the proper stretch material needles. Who knew.

Ahem.

so, it came about easily enough. I used navy for the cuffs and body and the clouds for the sleeves and collar.  I only had one minor WTF moment when I pinned the hem cuff to the wrong side and had to unpin and repin. It was a 20 minute waste of time but I pushed on through and out it all back together the right way eventually.

IMG_0503I top stitched the cuffs because I like it

IMG_0504
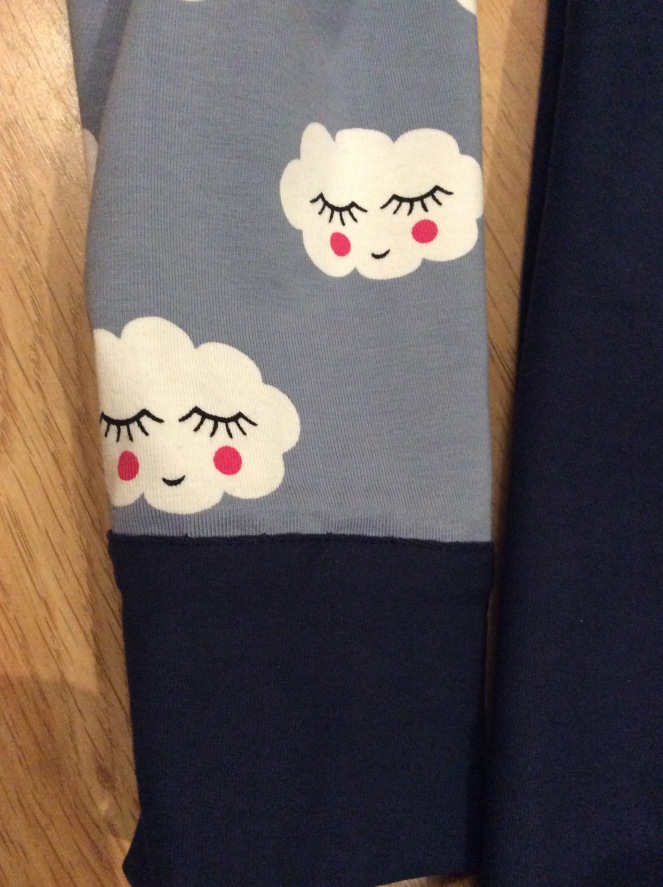
Not that you can see it. But it’s there and neat. Ah, look a top those bashful clouds. Lovely. And I did a double line of stitching along the collar. Not quite as neatly as I wanted but it’s good enough*
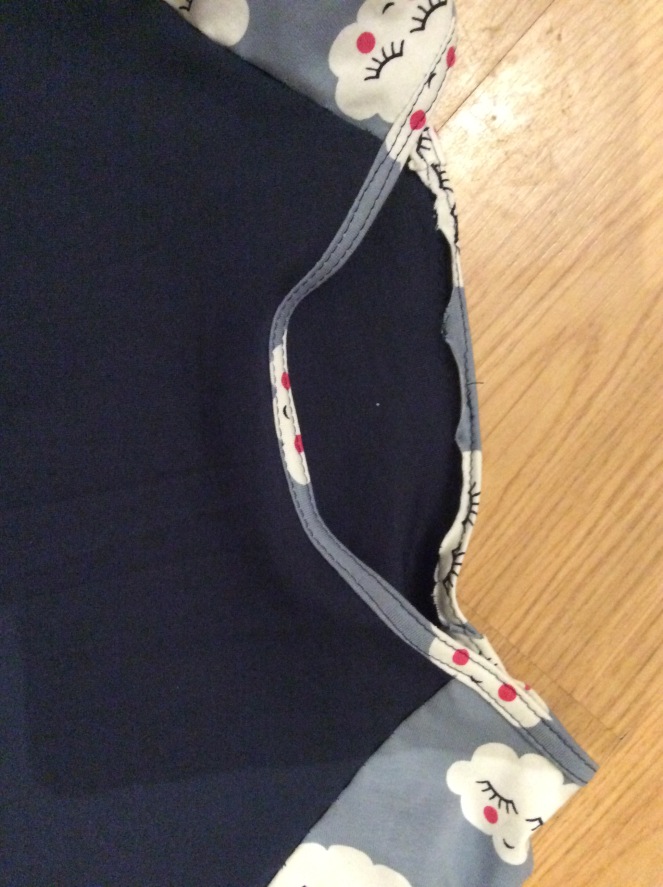
IMG_0505And that was that.

It is really comfortable and flattering to wear. My cloudy top of loveliness.


* good enough is, I’ve finally realised, actually good enough. I don’t need to see things perfectly in order to wear them. I mean, it’s not like clothes I buy are perfect. So why expect ridiculously high standards from myself when I don’t expect it from ready to wear clothes? Good enough is good enough.

Beginnings · Clothing · Sewing Projects

Drafting my own pattern

i decided that I need to start using up my fabric stash by actually making some clothes. I can’t keep pawing the nice fabric and googling interesting patterns forever, I need to just bite the bullet and, you know, SEW THE DAMN THINGS.

but what do I want to sew? That stumped me. I want to make some dresses and another pencil skirt, but in a different pattern to the last one. And I want some t-shirts that look well-made-not-made-by-accident. I do wear a couple of the tops I made earlier, but I’m not completely happy with the fit or the neck line.

The other problem I have is patterns. I’ve got a few that are ok, but I really wanted some raglan sleeve tops like thatDress-turned-into-a-top I altered . But I don’t have a pattern for that.

i KNOW. I thought. I will MAKE MY OWN PATTERN. must be easy.

i started drafting it last weekend, rolled out the giant roll of drawing paper belonging to the children and traced out the first piece. And was then joined by a toddler who wanted to join in.


image

He traced a few lines then demanded that i trap round his hand a few times.

Anyway, I rolled the paper back up and left it for another day. Today!  I have now traced out the back piece and the sleeves.

image

All I have to do now is mark it out properly on squared paper to make the lines straight and transfer it on to fabric.


which is another story really. I have LOADS of 1 metre lengths. In my head, that should be plenty for a top. Going by the patterns I have, tops seem to need about 1.5 metres AT LEAST. Another part of drafting my own pattern was a determined/headstrong thought that SURELY I could do a top in s metre. Surely.

i will let you know…

Clothing · Clothing the children · Sewing Projects

One Day Hoodie

I’ve called this the One Day Hoodie because it only took me one day to make. And also because hopefully one day my daughter will like it…image
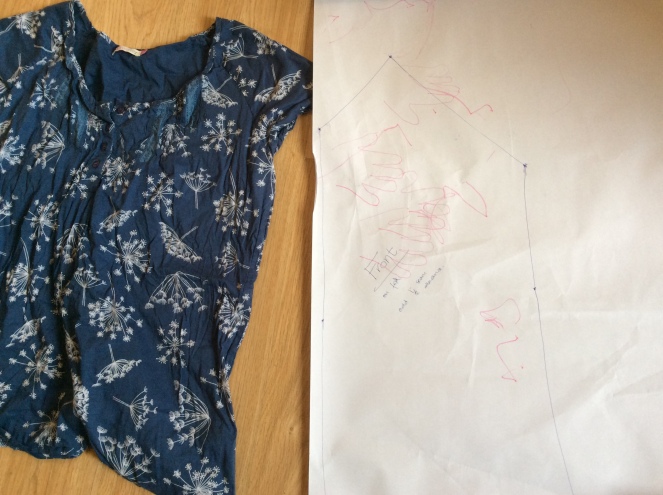
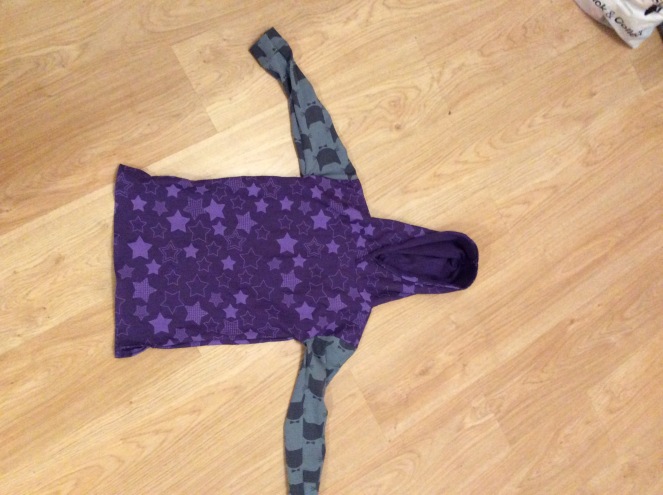
It is another item from the Ottobre magazine I bought, with fabric chosen by the girl herself. It was meant to be completely in the star material but for some completely unknown reason I only bought half a metre of it so I had to improvise and use the cat jersey I’d bought (again half a metre of it. Why so little? Search me. Can’t remember why. Sleep deprivation or general all round madness resulting in reluctance to buy enough fabric.) for a skirt for her. I did check with her, made sure she was happy with this turn of events. She confirmed she was. And promised to wear the jumper.

Aaaaaaanyway, we all know how that works out.

back to the pattern. What I’ve learnt is that Ottobre magazine has some really lovely patterns. But boy, their instructions are on the light side.

image
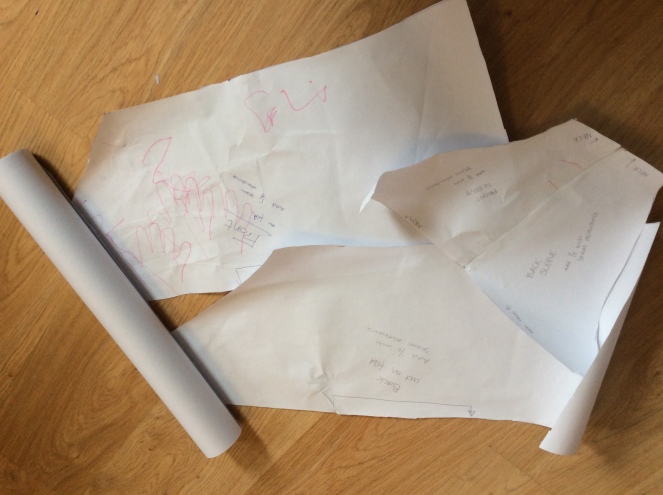
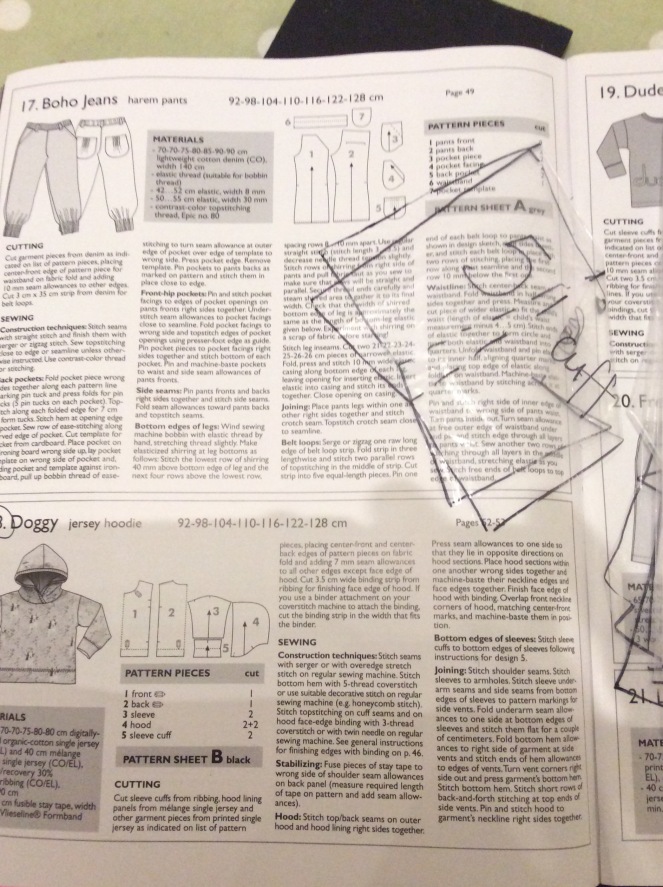
That bottom 1/3 of the page? That is the full set of instructions for the top. I figured out the cuffs no problem

image
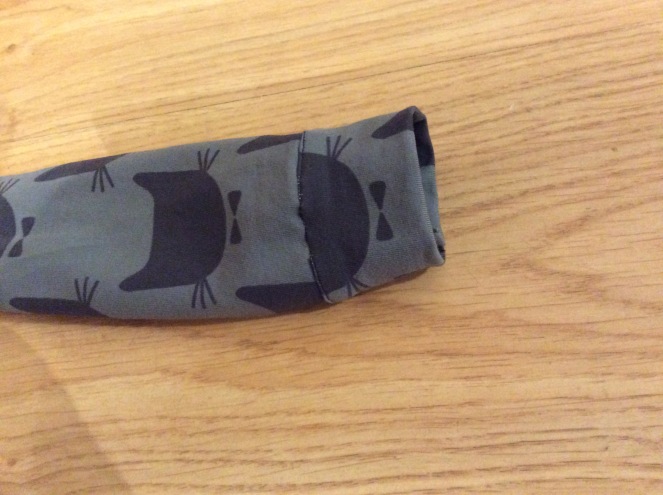
And I I actually really love how neat they are.

but the hood? That took a bit of puzzling. I have to admit to doing a bit of deep thinking about attaching the hood while settling the boy when he grumbled a bit in the evening. Finally, I just decided to go with what seemed right and it worked out ok

image
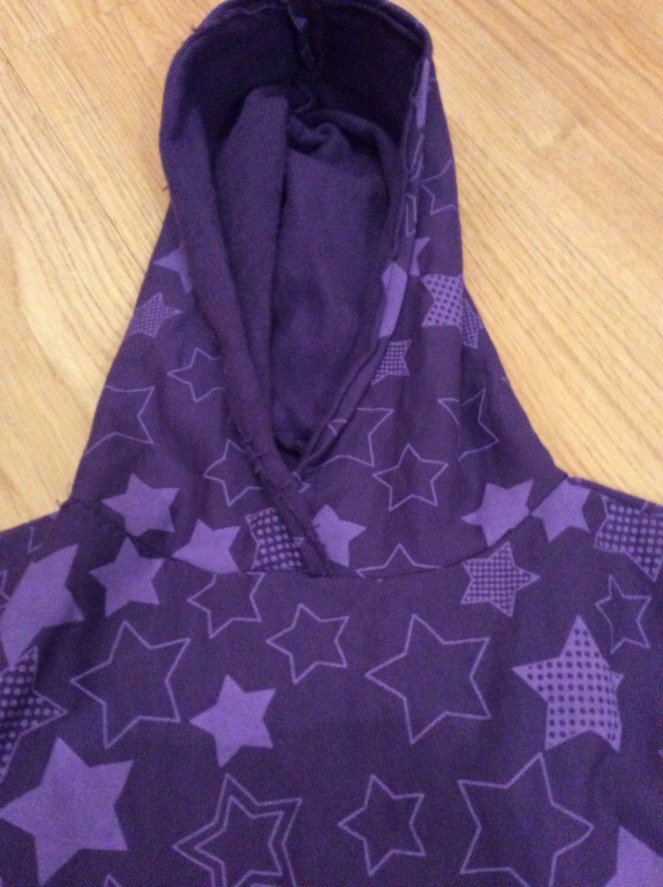
There’s a bit of…rusticness about the edging of the hood. But it looks fine to me. The jumper is in a lovely soft sweatshirt and it just kept curling at the edges. Not to worry, if I wanted perfect then I’d have bought something in the shop.

all in all, it’s a lovely pattern and was surprisingly quick and simple to put together. The difficult bit now will be getting her to wear it…

Clothing · Clothing the children · Sewing Projects

Small top for a small boy

I made a top in 24hrs for the boy. It’s a raglan sleeve jersey knit top, using an Ottobre Autumn 2016 magazine pattern and I love this. I decided that it was time the boy had some home seen clothes, seeing as his sister has so many skirts and dresses. And I spotted the Ottobre magazine in a paper shop a few weeks ago and that sewed the seed in my mind. However, I didn’t buy the magazine. ROOKIE ERROR. My head was full of the cute patterns and designs in the magazine, including a hoodie design I’d earmarked for the girl, but I didn’t have the magazine…

i bought jersey fabric from http://www.myfabrics.co.uk, a cute circus design and a knight design for the boy, purple star sweatshirt and grey cat jersey for the girl. All ready to make the patterns from Ottobre. BUT I DIDNT HAVE THE MAGAZINE.

i merrily went to the paper shop a fortnight ago to buy the magazine. But wait…THEY DIDN’T HAVE THE MAGAZINE?! Aaaargh!

Eventually, I managed to buy it from http://www.dotsnstripes.co.uk – ordered last weekend and received it on Thursday. Excellent service. And THE JOY, all the lovely patterns were there.

image
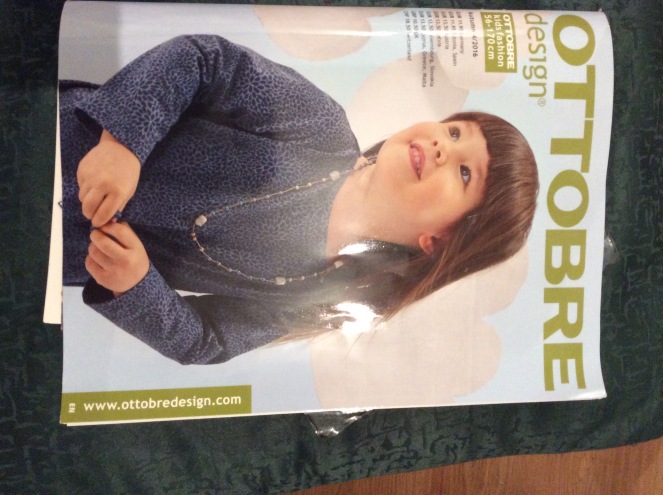
Last night I traced out the pattern, cut out the fabric (which I had already dutifully washed and dried, which is very unusual for me, I know) and today in between boy nap time and the odd twenty minutes here and there, I pinned the pieces together and sewed it up. I have to admit here that I didn’t follow the instructions. As in I didn’t follow the instructions AT ALL. They seemed pretty sparse to me and I just thought, meh, I’ll figure it out. Im sure the neck could have been neater. I’ve realised I pigging HATE bias binding. Especially jersey stretch bias binding. But I’m still completely thrilled with this top. Go me!

image

I love the raglan sleeves

image

And the cuffs were meant to be jersey rib or what have you, but I just thought that the same fabric would look nice. Remind me that it was my choice if it stretches…

image

and the bonus is that the boy is too young to refuse to wear the top. So no refusing to put it on like his big sister. Win!


Clothing · Sewing Projects · Uncategorized

No pattern skirt for my girl

my girl chose this fabric a few weeks ago when we were out Starting School shopping. image
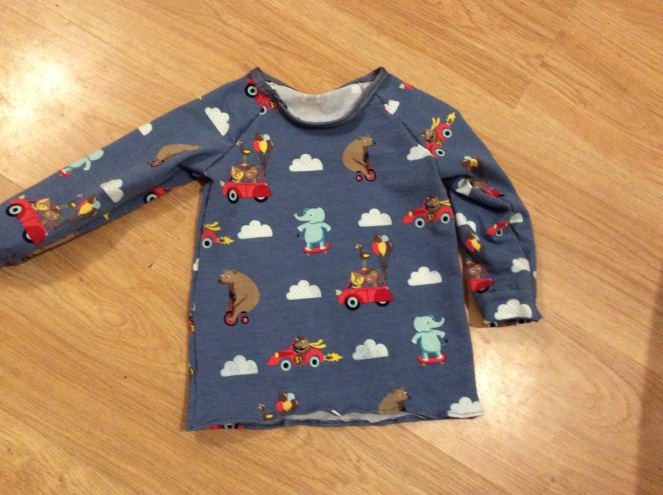
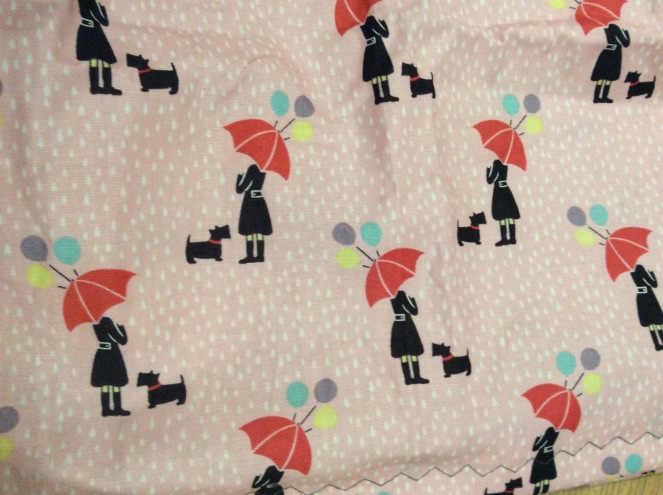
It’s a gorgeous light pink background with a super cute print. It also bears absolutely no relation to her school uniform, but let’s not think about that. (My BABY has started school! How is she FIVE?! My BABY etc etc) I promised her a skirt out of the fabric which was a pre cut 1metre offering.

that was a month ago. A fortnight ago I cut it in half and decided I would make a gathered skirt for her. With a waistband (I like waistbands) and a zip. And today, I turned it into this:

image
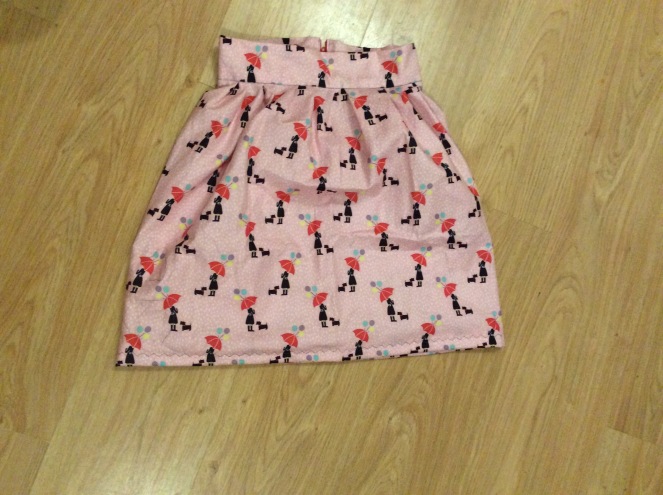
I did this in an afternoon. I am SUPER proud.

How did I do this? I had no pattern. So I made E stand and looped the fabric round her once, and pinned the ends together. The fabric is about 44 inches wide, E is about 22 inches all around. I pinned fairly regularly all around some gathers. And made them bigger to make sure it was taken in enough not to fall off her.

I really puzzled over these gathers. I wanted the skirt to sort of flooff out and eventually decided just to sew around the top, trapping the gathers in the thread. It worked! Hoorah! I also pinned in the zip to make sure it was in the right place for the next step.

next step was the waistband. This was slightly longer than E’s waist measurement and had a nice depth to it so that I could double it over, encasing the top hem and stitching of the skirt. I sewed right sides together at first, then turned it over and trapped the top hem in. This was tricky, I had to stitch in the ditch (assuming I’ve got the right term and am not referencing something else…) as I didn’t want visible stitches. It wasn’t totally successful But it is fairly neat so, you know, win.

image
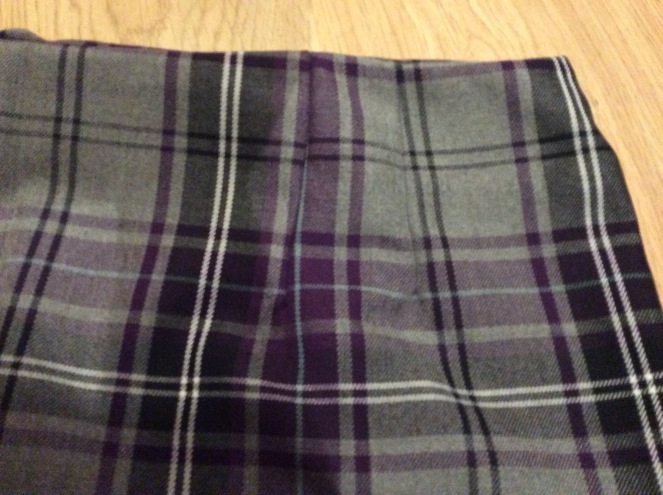
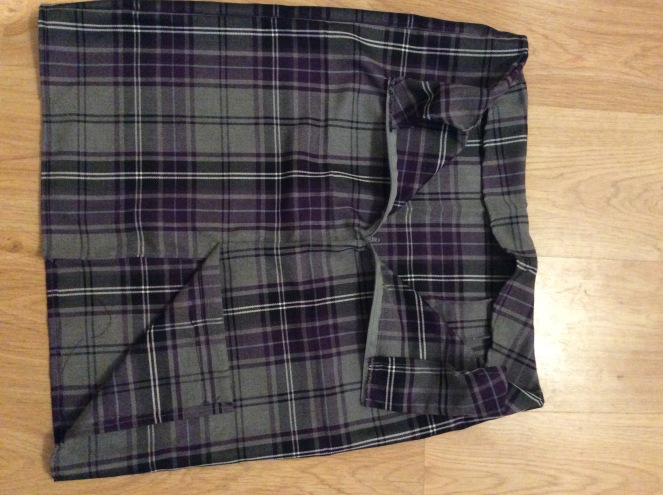
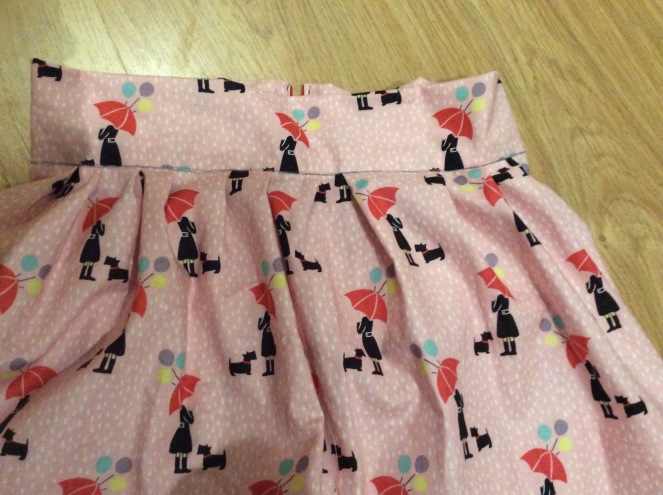
Then I sewed in the zip and back seam

image
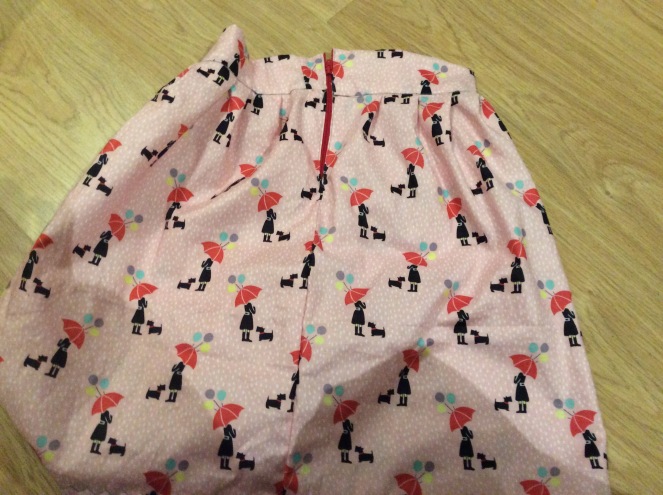
And finished off with the hem. Now, this is a long skirt, and I wanted to give E the option of being able to wear it until she turns 26, so I just turned the bottom hem up twice rather than cut the excess off. Finished with a zig zag hem, it is done.

I only hope she will wear it…

Clothing · Sewing Projects

Made a Pencil Skirt (3 years in the making)

is this a record for having fabric in a stash earmarked for a certain project? I bought the Great British Sewing Bee: Sew Your Own Wardrobe about three years ago. Shortly after, once I decided I wanted a pencil skirt, I bought a ridiculous amount of tartan fabric to use. And then left it neatly folded in a bag until a fortnight ago. I know. I had even traced the pattern very carefully onto some plastic tracing paper which was also neatly folded in the bag. I know.

It took until a fortnight ago for me to build up the courage to make the skirt. I realised that the fabric was being wasted and I had now made a few items that I actually wear regularly, so there was no point waiting any longer.

so here it is!

image
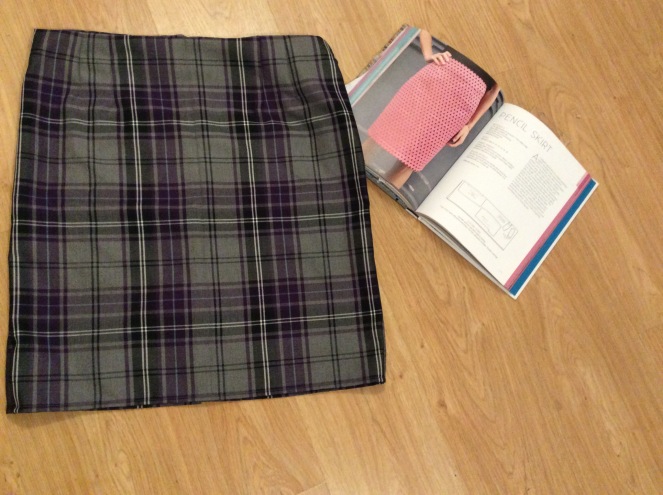
I am SO chuffed with this, with some reservations. I followed the size guide in the book, which was something like an 18 (waist is 31.5 inches) but when I put it on before doing the zip and facing, it immediately slipped off me. It’s possible I’ve not used the right seam allowance, but I had to take just over an inch off each side and it is still loose. I’ve lost the pencil shape as well, the exaggerated shape didn’t suit me but that could be down to the pattern too.

I struggled with some of the instructions too.

I shall add the zip and kick flare whatsit to the “WTF now?” files. There was some instruction about how to stitch the kick flare thing which I genuinely ignored as I didn’t understand what it was going about with regards to overlapping and what have you. I read and read it. NOT A CLUE. Rather than dissolve into a hot tearful mess, I just ignored it and stitched it the way that made sense to me. It looks fine.

then the zip. Again, I read it. I looked at my zip. I looked at the fabric. I read the book. I closed the book and just sewed the zip in how I wanted to. Again, it looks fine. The pattern calls for an invisible zip. CLUELESS over here just had a grey zip. And I wasn’t sure how far up I was meant to have the zip. What’s that about a hook-and-eye closure? Pfft, I ignored that too. Whatever. Looks fine.

i am really pleased with my darts though.

image

And my facing has epic pattern I matching (and the side seams although that is harder to show). I’ve not interfaced it and not ironed/pressed anything (come on, let’s be honest, I never do and it’s only once I’m half way through that I remember I should have done this and possibly even pre washed but then I ignore those thoughts and they go away) so hopefully once I wear it, the facing will settle down.

imageStill.

I love it. I’m going to wear it with purple tights, natty shoes and a black top. And an insufferable smug look on my face.

Alterations · Clothing · Uncategorized

Alteration! (Or: I want to wear this tomorrow, but not as a dress)

image

about five years ago, I bought this lovely dress. I’d had a baby (daughter E, now five) and wanted something light and summery I could wear that also let me breast feed. I’d decided that I was going to wear dresses, that summer of maternity leave, and possibly gladiator sandals, with my hair perfectly tousled and some understated yet on-trend sunglasses balanced on my head. This dress fit that picture. Real life, however, did not. I wore jeans and shorts and normal t shirts. So the dress stayed in the wardrobe and occasionally I would see it and paw the lovely fabric and pattern and then ignore it for a few more months years.

since then, I have actually worn the dress. With a belt because it was a bit baggy after I’d lost the baby weight. Then ignored it as I got pregnant, had the boy and again failed to wear it as by that point I realised that I loved the fabric and the top part of the dress, I didn’t like it as a dress. It was too baggy to wear without a belt, but when I wore it with a belt it became too short and the excess fabric bagged out, making me look GINORMOUS. So I ignored it again.

but this week, I pulled it out and thought “wouldn’t this make a gorgeous top?  I wish I had a top like this.” Then I basically slapped myself on my forehead, shouted “you IDIOT, it COULD be a top.”

image

So I made it a top. I tried the dress on, and pinned it where I thought it would be a good length for a top. It turned out to be 9 inches, so I hacked it off. Then the lining, well 10 inches came off that because I don’t want to have the lining hanging out. Who would, right?

I pinned up the outside fabric by half an inch then sewed it up. Then looked at it and cried, because the tension was too high for such a light fabric and it had pulled atrociously. I ripped out the seam at approximately midnight on Thursday night. Sobs.

Half an hour ago, I repinned both the inner and outer fabrics by half an inch, turned the tension waaaaaay looooooow and, starting on the lining, I sewed nice and slowly and ended up with a lovely hem. Hooray. Then I did the same with the outer fabric, took it even slower and… No pulls. Brilliant.

image

And done!

im going to wear it out tomorrow for lunch. And yes, I will tell everyone that I altered it myself. It’s my first ever alteration. I am proud. And very pleased that I now have an item of clothing that I will wear, rather than some gorgeous material I occasionally remembered about but never wore.

image

Clothing · Sewing Projects

Late night sparklising

I mean, what else would I want to do at 10pm but sew on some sparkles to a small gymnastics leotard?

My five year old has a gymnastics show tomorrow and announced today that her (bright fuscia) leotard wasn’t bright enough and required some sparkles.

We negotiated and agreed on one cuff and a “dinagnogal” stripe across the tummy. She has high hopes and assumes I can make anything. I just hope for the best…

The sparkles came from the frozen outfit I made (you know the one, the one she refused to wear) and I really did just cut a stripe and hand stitched a part round the cuff and then hand stitched the rest from shoulder to waist across the front.

image

Sparkly, isn’t it?

Let’s just hope she will wear it…

Clothing · Sewing Projects

Super star Arum top

I am pleased to announce that I have not only used fabric that I bought at the knitting and stitching show, but I have also used a pattern I bought there.

Yep, I made the Deer & Doe Arum top in a lovely grey blue with stars fabric.

image

It’s a pretty simple pattern and apart from a minor “ohmygawdz it’s not going to be big enough” frantic seam rip and resew, it was pretty straightforward too.

I love the fact that the seams at the back makes it so neat back there. I always seem to end up with a baggy back, but not this time!

image

That’s me, trying to get the back seam in shot but failing dismally. I was in a rush to get to work. Yes, I finished the pattern last night and wore it to work today. THAT’S how much I love this top!

Expect to see a few more versions of this top. It’s super comfortable, quick to sew up (if we ignore the fact after cutting out the fabric, seeing the back seams and the manic seam ripping and resew I left it in a bundle in the kitchen for four weeks until I felt brave enough to complete it) and I like the shape.

Did I tell you I love it?
I do I do I dooooo-oooo.