Uncategorized

Sob, wail, gnash of teeth (aka cutting out the pattern)

Sob.

Wail.

Gnash of teeth.

Last night I carried on cutting out the pink corduroy for the tiddler’s dress. I started cutting it out a fortnight or so ago, managed to cut out the front and back pieces and ran out of time before reaching the inner facings. So I tidily packed away the patterns, cut out fabric and uncut fabric. And the scraps too.

Can you see where I am going with this yet?

Last night I pulled it all out again and decided to cut out the facings. I remembered there were scraps, found one and realised it was big enough for one of the facings. So merrily pinned the pattern to the fabric and cut it out.

Any idea yet where I’m going now?

Once I’d cut out one of the facings, I reached for the pile of scraps to cut out the rest. Only, it wasn’t the pile of scraps.

It was the “pile” of already-cut dress pieces.

Yes. I cut up one of the already cut out pieces.

Le sob.

Thankfully there was enough fabric for me to recut the back dress piece I had HACKED up as well as cut out the remaining facings. But my god it was annoying.

Next time, I’m going to label EVERYTHING.

Sob.

Baking

Did somebody mention cake?

I have forgotten to update about The Baking.  Oh yes, the baking.  I loves it.  I love combining egg, butter, flour, whisks and bowls and heating it all up and getting a cake or a biscuit or another cakey-bakey-biscuity thing out of it all.

Yum.

It was my daughter’s first birthday on Saturday, and in preparation for the event, I baked.  I baked so much that I caused myself a shattered-baker’s injury (grated my thumb when making carrot cake fairy cakes.  Le Sob).  But do you know what?  I loved it.

So…what did I bake?  Loads.  I had a partyette on the Friday for The Baybeh and two baby friends (plus their mums.  don’t worry, i wasnt left wrangling three tiddlers on my own.  heaven forbid – how terrifying would that be? don’t answer that…).  Anyhoo – this is what I baked (and where from):

  • Cheesy bready straw things – came from Gill Rapley’s Baby Led Weaning Cookbook. These are FANTASTIC.  see www.babyledweaning.com for recipes and the like.
  • Carrot muffins from the same cookbook.  These were savoury much to my surprise! ha!
  • plain butter shortcake type biscuits.  which i then slathered in icing sugar.
  • Mary Berry’s sponge cake traybake thing.  It was a fairly simple 4 egg vanilla sponge with butter cream icing on top.  But it tasted DIVINE.
  • Carrot cake muffins (huzzah, not savoury in the slightest – full of sugar just the way it should be) with cream cheese icing.  I can’t remember where i found the recipe, it was either the Baby Led Weaning Cookbook, one of my trillion Rachel Allen recipe books or Nigella Lawson’s How To Be a Domestic Goddess.  Tasted fab-you-luss anyroad.

I didn’t manage to take many photos, but I did get one of the birthday cake.  Now, I come from a “more is more” school of cake decoration.  If i can add icing to something, i’ll add it. and then maybe a bit more.  and possibly another sort of decoration.  and text.  and a candle.  and a few biscuits. and… 

here it is! 

I blanked out the Baybeh’s name, that’s not a perfect rectangle of royal icing…

Anyway – we’ve just finished eating the cake.  it really was lovely.  I may have to bake another one soon…


Baby products · Sewing Projects

Bunting Breakthrough! (ie – it’s finished)

Finally, finally, I’ve finished the bunting.  I have still to hang it up in the appropriate location in the house but I have finally finished it.

The Gigantic Sewing Cupboard has been relocated to a wee space at the top of our stairs, right underneath a rooflight with fantastic light and fantastic views (for when i need a bit more distraction from a job in hand…)

Here it is! (scuse the sandals. I was getting ready to wedge myself into the only-just-big-enough gap between the sewing Cupboard and the wall)

I love this space – somewhere just to sew and a great use of a pretty unused space too. 

So, once I managed to get the machine installed (thanks muchly to the Husband for doing the heavy lifting!) and wedged into position, I got cracking on piecing together the bunting.  I had ironed the pieces again to make sure they were flat and looked as neat as possible.  I put wrong side to wrong side before stitching


 I had to pin them together as I really wasn’t sure i could trust my ability to sew straight.  I also had to get the instructions out yet again as I had forgotten how to insert the bobbin.  As I have said, I’m an amateur…

Once pinned together, I bit my lip, crossed my fingers and started to sew.  It went fairly well.  I sewed all of the bunting triangles together, then managed to turn them inside out and admired my handiwork.  Hurrah.  Next step was adding the ribbon.  Up until this point, I could back out at any point – i could decide that i was just making a series of flags and then leave them alone.  But stitching them to the ribbon meant that I was actually making bunting. 

But I got over myself and pinned the fabric to the ribbon

The next step was to make free and liberal use of the zig-zag stitch

With varying degrees of success.

And then, before I knew it, I was done.  I had sewn all the pieces to the ribbon, managed not to get any the wrong way round and it looks pretty good. 


When I’ve put it up on the wall, I’ll take another picture.  But for now, I have quite a feeling of pride.  I sewed something! it looks pretty nice!

I showed the bunting to my Gran yesterday.  She told me “I didn’t think YOU could do something nice like this” which, from her, is high praise indeed.


Uncategorized

In at the deep end?

No photos today, just some musings…

Yesterday the tiddler and I had a day out with a friend in the big smoke, and managed to make a detour to John Lewis’s haberdashery department.  Thankfully (for my bank balance) I was only able to spend 15 minutes there, otherwise I would have bought a huge amount of fabric and bits and bobs.  As it was, I decided to buy some fabric. 

For a specific purpose.  For dressmaking purposes.

So far, the only time I’ve bought fabric has been to either make cushion covers or the embryonic bunting.  The cushion covers tend to involve fat quarters sewn together, with no measurements or cutting really required.  And the bunting is still at an early stage but so far has only involved me cutting round a triangular template. 

What did I buy?  I bought 1.5metres worth of lightweight dusky pink corduroy which I will hopefully be turning into a pinafore for the tiddler and (depending on what is left) a skirt for moi.

Gulp.

I have patterns to follow.  I have The Scissors of Doom.  I just need to build up a bit of courage and make the first cut…

wish me luck!

Baby products · Sewing Projects · Uncategorized

Baby Bunting – the beginnings

Gosh, I have been busy.

Part of my original mission statement (eurgh, I’m going to have to find some better way of referring to this.  List-o-stuff sounds too nautical to me but it’s all my brain is flinging up) was that I wanted to make some bunting for the Baby’s room.  It has only taken me a few months to sort out the fabric, find a bit of cardboard, cut it into a template, cut the fabric very roughly and spray it with spray starch.  When I write it like that, it does sound like a lot of hard work, doesn’t it?  It does, doesn’t it.  Yes, glad you agree.

When I was in Dublin last year with husband and baby, we walked past a lovely fabric shop and I popped in to find a really cute roll of fabric with a Japanese doll pattern on it.  I bought a couple of metres and decided that I would make some canvases for the wall (done! hooray!) and also some bunting too.  Well, it’s only 8 months since then, you can forgive me for being a little slow.  But ignore all that now!  I cut out a couple of the dolls to use in the bunting – i’ll hopefully do some more, but these are the starting points, can’t rush things now:

 Here she is – the Little Green Lady.  How cute is she?  Look at her little heart shaped mouth and wee rosy cheeks. And her matching bobbles in her bunches!  ah, lovely.

Anyway, I cut around her on the fabric, making a rectangular piece of.. um… fabric.  It’s pretty tightly cropped as this was a left over piece from making the canvases but I’ve figured that it means I haven’t wasted it so it is worth a go.

Look at the bamboo print! SO CUTE.

Can you tell i’m trying to fill in the space? I’m new to this blogging, what can i say.  I’m trying to fill in the gaps as i go.


Tum te tum… Space! hooray.

After I cut out the first doll, I decided to go for broke and cut out the second doll.  And here she is!

And isn’t she cute too?  Heart shaped mouth? Check. Rosy cheeks? Double check.  And cute bamboo printed brightly coloured kimono?  Ah, definitely check.

The colours in these two dolls, and the others on the roll of fabric that I haven’t yet cut out (due to slight nerves withThe Scissors of Doom and fear of ruining the lovely fabric), gave me a bit of inspiration with the bunting.  Why would i stick with boring old gingham or flowers when instead I could buy random bits of fabric that were brightly coloured?  Then I could jazz up the baby’s room, and have a bit of fun while I was at it.

So on I searched for some lovely bright bits of fabric to use.


Oooh, here they are – all cut into triangles and arranged in an arrangement in an attempt to make them look arty:


The purple gingham, light blue disc fabric and purple mottled fabric are fat quarters, bought from The Peacock and The Tortoise in Perth which has a fantastic range of fabric.  Really beautiful collection, everything from gingham fat quarters to big chunky bolts of The Hungry Caterpillar fabric.  Beautiful.

The other two pieces I bought from The Blue Magpie in Dunkeld.  I don’t think there is a website, but it is a lovely Nice Things Shop.  I bought a card and notebook for my cousin there as well as the fabric, and believe me when I say I could happily have spent a fortune in there.  The only thing that stopped me was my father looking on incredulously as I picked up various nicknacks and bits of fabric and this that and the other.

The red fabric caught my eye first of all:

I have (really roughly) cut it into a triangle here, but you can see the repeating flower pattern.  So bright, so geometric, so flowery.

It’s slightly retro too, I think. 

Anyway, I like the way the flowers face both up and down, as that means that there is no right or wrong way.  That’s what I tell myself anyway, hoping fervently that it’s not going to look wonky on the bunting.

Anyway, the next piece of fabric I found in The Blue Magpie was this lovely yellow:

I’ve taken a close up here so that you can see the pattern on the fabric and not look at the badly cut edges.  I love the pattern and detail in the birds and dragonflies. 

The colour is closer to mustard than bright yellow.  Hopefully this isn’t going to be too dowdy in the bunting when it is finished. 

Actually, the plan is to not really care if it’s dowdy or not because the riot of colours from the other triangles and the colours from the Japanese dolls will hopefully make this sing a bit more. Ah, it’s all in the finger crossing and hope.

So that is the progress to date.  You’ve seen the fabric, you’ve seen the machine.  All I need to do is attach the coloured fabric to the backing fabric (a hastily hacked up sheet that doesn’t fit any of our beds) and then attach the pieces together.

Easy!

Sewing Projects · Uncategorized

My machine in a box

It’s been a while, but I’ve been busy/not done anything crafty/not bothered to do anything so had nothing to blog about.

but that is all going to change! yes, i’ve been motivated to blog again by the fact that my husband has done a very good deed indeed and painted my sewing-machine-in-a-box.  No before photos unfortunately, but here are some afters:

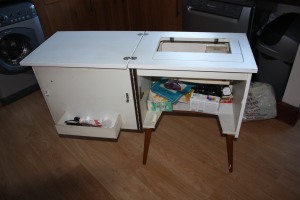
The Box

Scuse the bin in the background… it’s a heavy old thing and i didn’t want to (couldn’t be bothered) to move it before taking the photos.

See the sturdy brown legs.  and the newly painted body.  It weighs about 500 tonnes and is incredibly awkward.  but inside that big square tummy is…

The door opens out and has a very neat storage shelf for The Scissors Of Doom.  These have to be the biggest, rustiest yet sharpest scissors I’ve ever seen.  Anyway, I have also stuffed some thread in there to keep the scissors company.

There’s a big storage area in the body of the cupboard – here you can see I have carefully shoved the instructions, footpedal, assorted bits and pieces and things.  All very orderly.  There is a shelf inside for more stuff storage too.  Huzzah.

Anyway, enough about the inside – can you see the interesting hole on top?  well, that ingeniously folds out into:

Ta-DAH! The machine! It rises from the depths of the BEAST, emerging into the world like a sewing machine venus.  (again, scuse the bin.  I wasn’t intending on doing the photoshoot…)

I got a little bit overexcited with the camera at this point, rush of blood to the lens so to speak. So here are some close ups.  I haven’t cleaned the machine so there must be decades of grub layering this.  Ho hum, never mind, it works, that’s all that counts. 

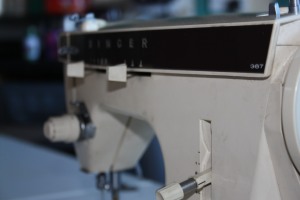
Right – here’s a close up

So this is where most of the grime is… But ignore that for the time being.  Look – here are some knobs and levers.  And twiddly bits.  Hark at my technical knowledge. 

Next close up:

Rust and needle.  Lovely. But this is the business bit and it works and that is all that counts.

So that is that – the Machine In A Box (aka The Beast) has been opened.  Time to start getting creative I think.